A brand new property does not open on the dashboard. It opens on a checklist of nine steps, and a banner follows you around the rest of the application until they are done. This article explains what each step decides and points at the article that covers it. It deliberately repeats none of them: the checklist is a running order, not a manual.
The checklist
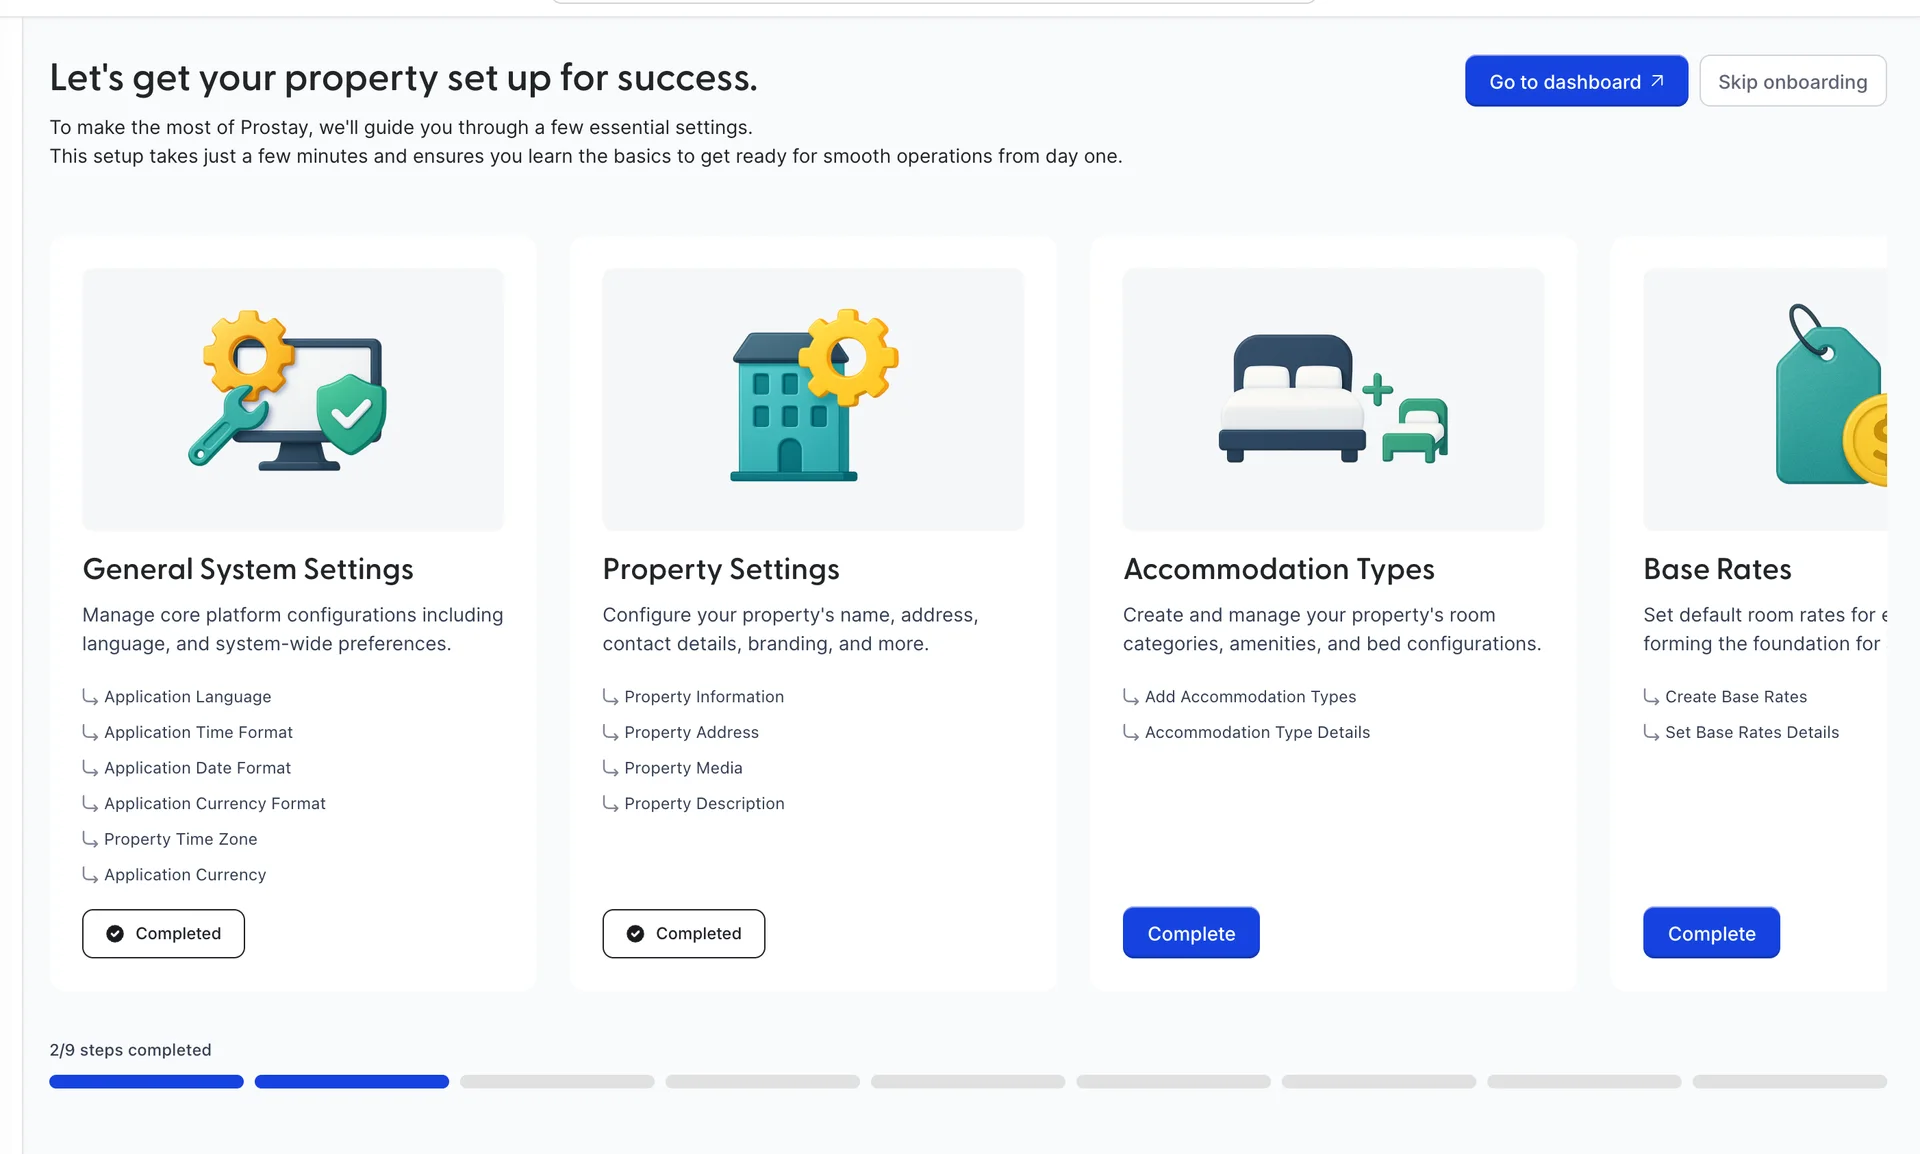
Each card lists the individual settings it covers, and its Complete button opens the screen where you do them. A card you have already been through shows Completed instead, and the counter at the foot moves. Go to dashboard leaves the checklist without finishing it, and you can come back to it from the banner.
The nine steps and where each one is explained
| Step | What it decides | Read |
|---|---|---|
| 1. General System Settings | Property currency, time zone, language, and the date, time and number formats every other screen uses. | General system settings |
| 2. Property Settings | The property record itself: name, address, description and photographs, which the booking engine and guest emails read from. | Property details, address and photos |
| 3. Accommodation Types | The kinds of room you sell and the individual rooms in each, which is what the calendar and availability are built from. | Accommodation types and rooms |
| 4. Base Rates | The nightly price of each accommodation type, and the seasons that change it. | Base rates and seasons |
| 5. Invoice Settings | What a guest invoice looks like and the numbering it uses. | Folio configuration and invoicing |
| 6. Folio Settings | Which folios a stay opens with, and which one charges land on by default. | Folio configuration and invoicing |
| 7. Taxes and Fees | Government taxes and service charges, how they are calculated and what they apply to. | Taxes and fees |
| 8. Booking Policy Settings | Deposits, cancellation terms, check-in and check-out times, and the terms and privacy text a guest agrees to. | Policies |
| 9. Email Settings | The mailbox guest emails are sent from, and the rules that send them. | Connect an email account |
Why the order matters
The nine are not arbitrary. Four of them are read by everything that comes after, and doing them late means going back over work.
- Currency and time zone are first for a reason. The property currency is what every rate, folio, invoice and report is denominated in, and the time zone decides which day a booking, a charge and a night audit belong to. Changing either after you have taken bookings does not retranslate what is already recorded.
- Accommodation types come before rates. A base rate is a price for a type of room, so there is nothing to price until the types exist.
- Taxes come before you sell anything. Tax is worked out when a charge is posted, so a charge posted before the tax exists stays untaxed and has to be corrected by hand.
- Email settings are last but not optional. Until a mailbox is connected and marked as the system account, no confirmation, no cancellation and no pre-arrival email reaches anybody, and nothing on the booking screens says so.
The banner on every screen

The banner appears on every screen in every module while the property is unfinished, counting the steps that remain. Resume takes you back to the checklist. It is not a warning about anything being broken, and the application works normally underneath it: it is there because a property that stops halfway through setup usually stops on a step that matters, and nothing else would tell you.
Skipping, and what it costs
Skip onboarding, on the banner or the checklist, marks the property as set up. The confirmation says the action cannot be undone, and it means it: the checklist and the banner both go, and there is no screen anywhere that brings them back.
What skipping does not do is skip the work. Every setting on the nine cards still has to be right before the property takes real bookings, and each one is reachable directly from the settings menus afterwards. Skipping loses the running order and the reminder, nothing else.
Three things the checklist leaves out
The nine steps cover a property that sells rooms from its own front desk. Three more things are needed before most properties are actually trading, and none of them appears on the checklist.
| Missing | Why it matters | Read |
|---|---|---|
| Your colleagues | Until users exist, you are the only person who can sign in, and roles decide what each of them can see and change. | Users, roles and permissions |
| Taking payment | Rates and taxes describe what a guest owes. Payment options are what lets you take it, on the desk or on the booking engine. | Payment options |
| Where the bookings come from | A property with rooms and rates but no channels or booking engine has an empty calendar, and both need the first four steps to be finished before they can be connected. | How the channel manager fits together and how guests find and book |
If you are moving from another system rather than opening a new property, existing bookings can be imported from a file rather than retyped, and that is a separate job from this checklist. Do it after steps three and four, since an imported booking has to land on a room type Prostay already knows about.
Where to go next
- Signing in and finding your way around, for the controls in the top bar and how to move between modules.
- What Prostay is, and which part you are in, for what else your subscription includes.
- Where the settings live, for finding any of the nine screens again once the checklist has gone.
- The words Prostay uses, if folio, rate plan or accommodation type are new to you.
Once the checklist is done, the first two things anybody actually does at the desk are creating a reservation and checking guests in and out.